Last updated · 2 min read
How to resize an image to exact pixel dimensions
Websites, marketplaces and social networks all have preferred image sizes, and a modern phone photo is usually several times larger than any of them. Resizing to the size you actually need makes pages load faster and uploads succeed. This guide covers the three ways to fit an image into a size, and how to avoid the classic squashed-photo mistake.
Resize in three steps
- Step 1: Open Resize image and add JPG, PNG or WebP files.
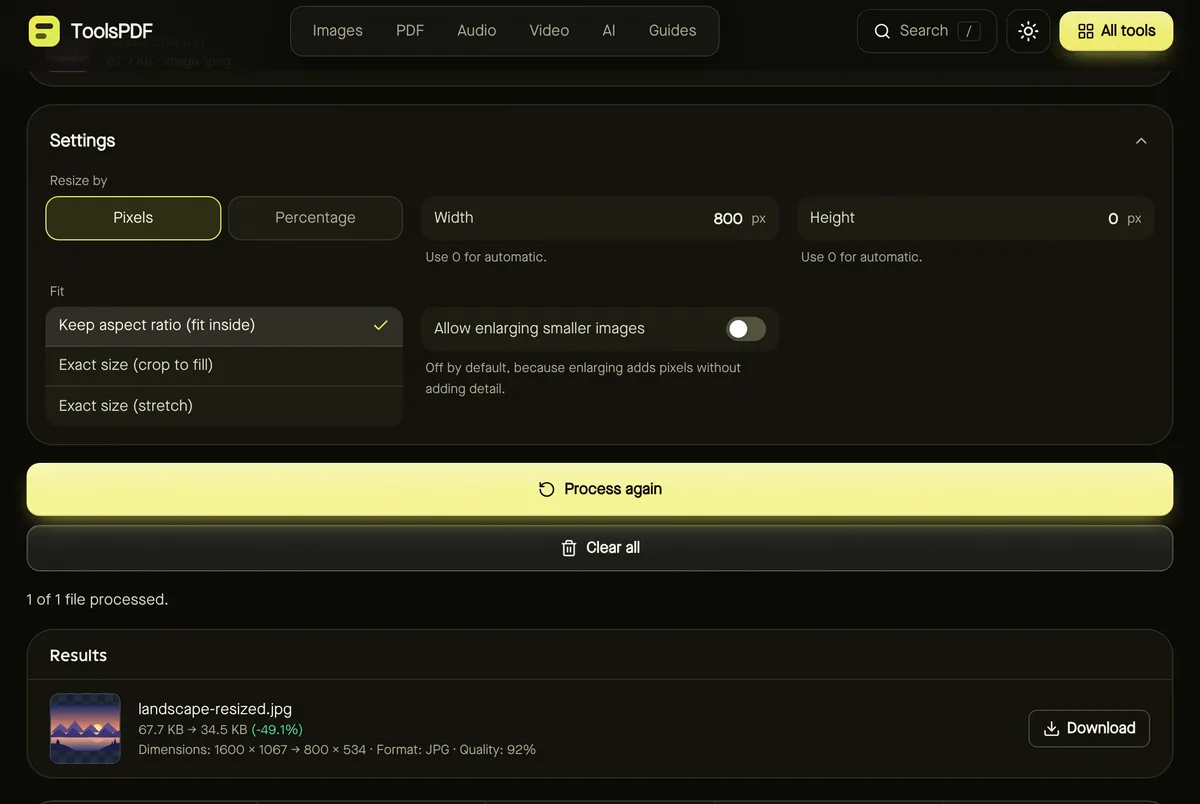
- Step 2: Choose Pixels and enter a width, a height or both — or choose Percentage, for example 50%.
- Step 3: Pick a Fit mode (explained below), click Start, and download the result.
Set either width or height to 0 to make it automatic. For example, a width of 1280 and height 0 gives you an image 1280 pixels wide with the height calculated to keep the original proportions.
Fit, fill or stretch?
| Mode | What it does | Best for |
|---|---|---|
| Keep aspect ratio (fit inside) | Scales the whole image to fit within the box. One side may be smaller than you asked. | Most everyday resizing |
| Exact size (crop to fill) | Fills the exact size and trims the edges evenly. | Thumbnails and fixed-size profile pictures |
| Exact size (stretch) | Forces the exact size, distorting proportions if they differ. | Rarely — only when distortion doesn't matter |
Should you enlarge small images?
By default the tool won't make an image bigger than its original, because ordinary enlarging adds pixels without adding detail — the result just looks soft. Switch on Allow enlarging smaller images only if a platform insists on a minimum size.
To genuinely improve a small image, use AI upscaling instead: Upscale image reconstructs sharper edges and detail at 2× or 4×.
Common sizes
- Website hero or banner: 1600–2400 pixels wide.
- Blog or article image: 1200–1600 pixels wide.
- Email newsletters: around 600–1200 pixels wide.
- Thumbnails: 300–600 pixels on the longest side.
Check your platform's own guidelines for exact requirements — they change over time. Resizing to the size you need, then compressing, gives you the smallest files.
Resizing many photos
The resize tool handles up to 50 images at once. For bigger batches — whole folders of product or holiday photos — the Bulk image resizer takes up to 100 and gives you a single ZIP. See how to resize many photos at once.
Frequently asked questions
Does resizing change the file format?
No. JPG stays JPG, PNG stays PNG and WebP stays WebP. Use the converter if you need a different format.
Are my photos rotated correctly?
Yes. Photos are turned upright using their orientation tag before resizing, so phone photos don't come out sideways.
What's the largest size I can create?
Up to 16,384 pixels on a side, within your device's memory. Very large results may fail on phones, with a clear message.